Its not often that I get this near completing a project without starting a blog. But, that is how this chemise has come together. I started, and I ran with it, and didn’t stop until it was nearly done.
When I completed my little smocked needle case, I found I really enjoyed the process and was excited to do more smocking in the future. Smocking is just one of those things I found to be really beautiful.
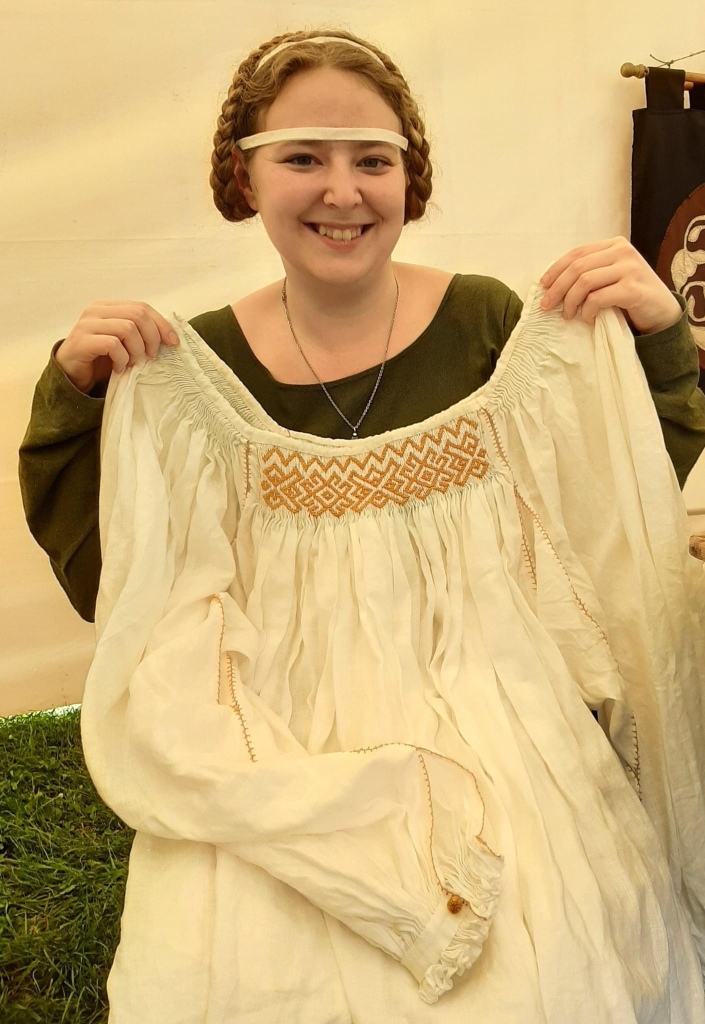
And so, this year when I decided to make a Tossfrau dress, I decided I needed a pleated hemd to wear with it. And thats how this whole idea was born.
The hemd is rectangular construction based on the below diagram.
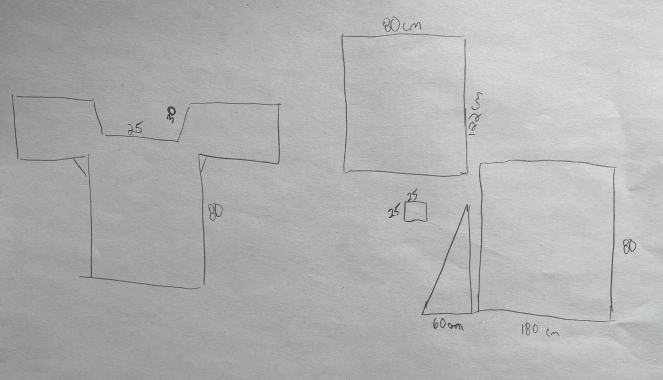
These measurements are very close to the original pattern of the extant Mary of Hapsburg Chemise in the Hungarian National Museum. Sadly, there are not many photos of this great art object online, so I relied on others research to tell me more about it.
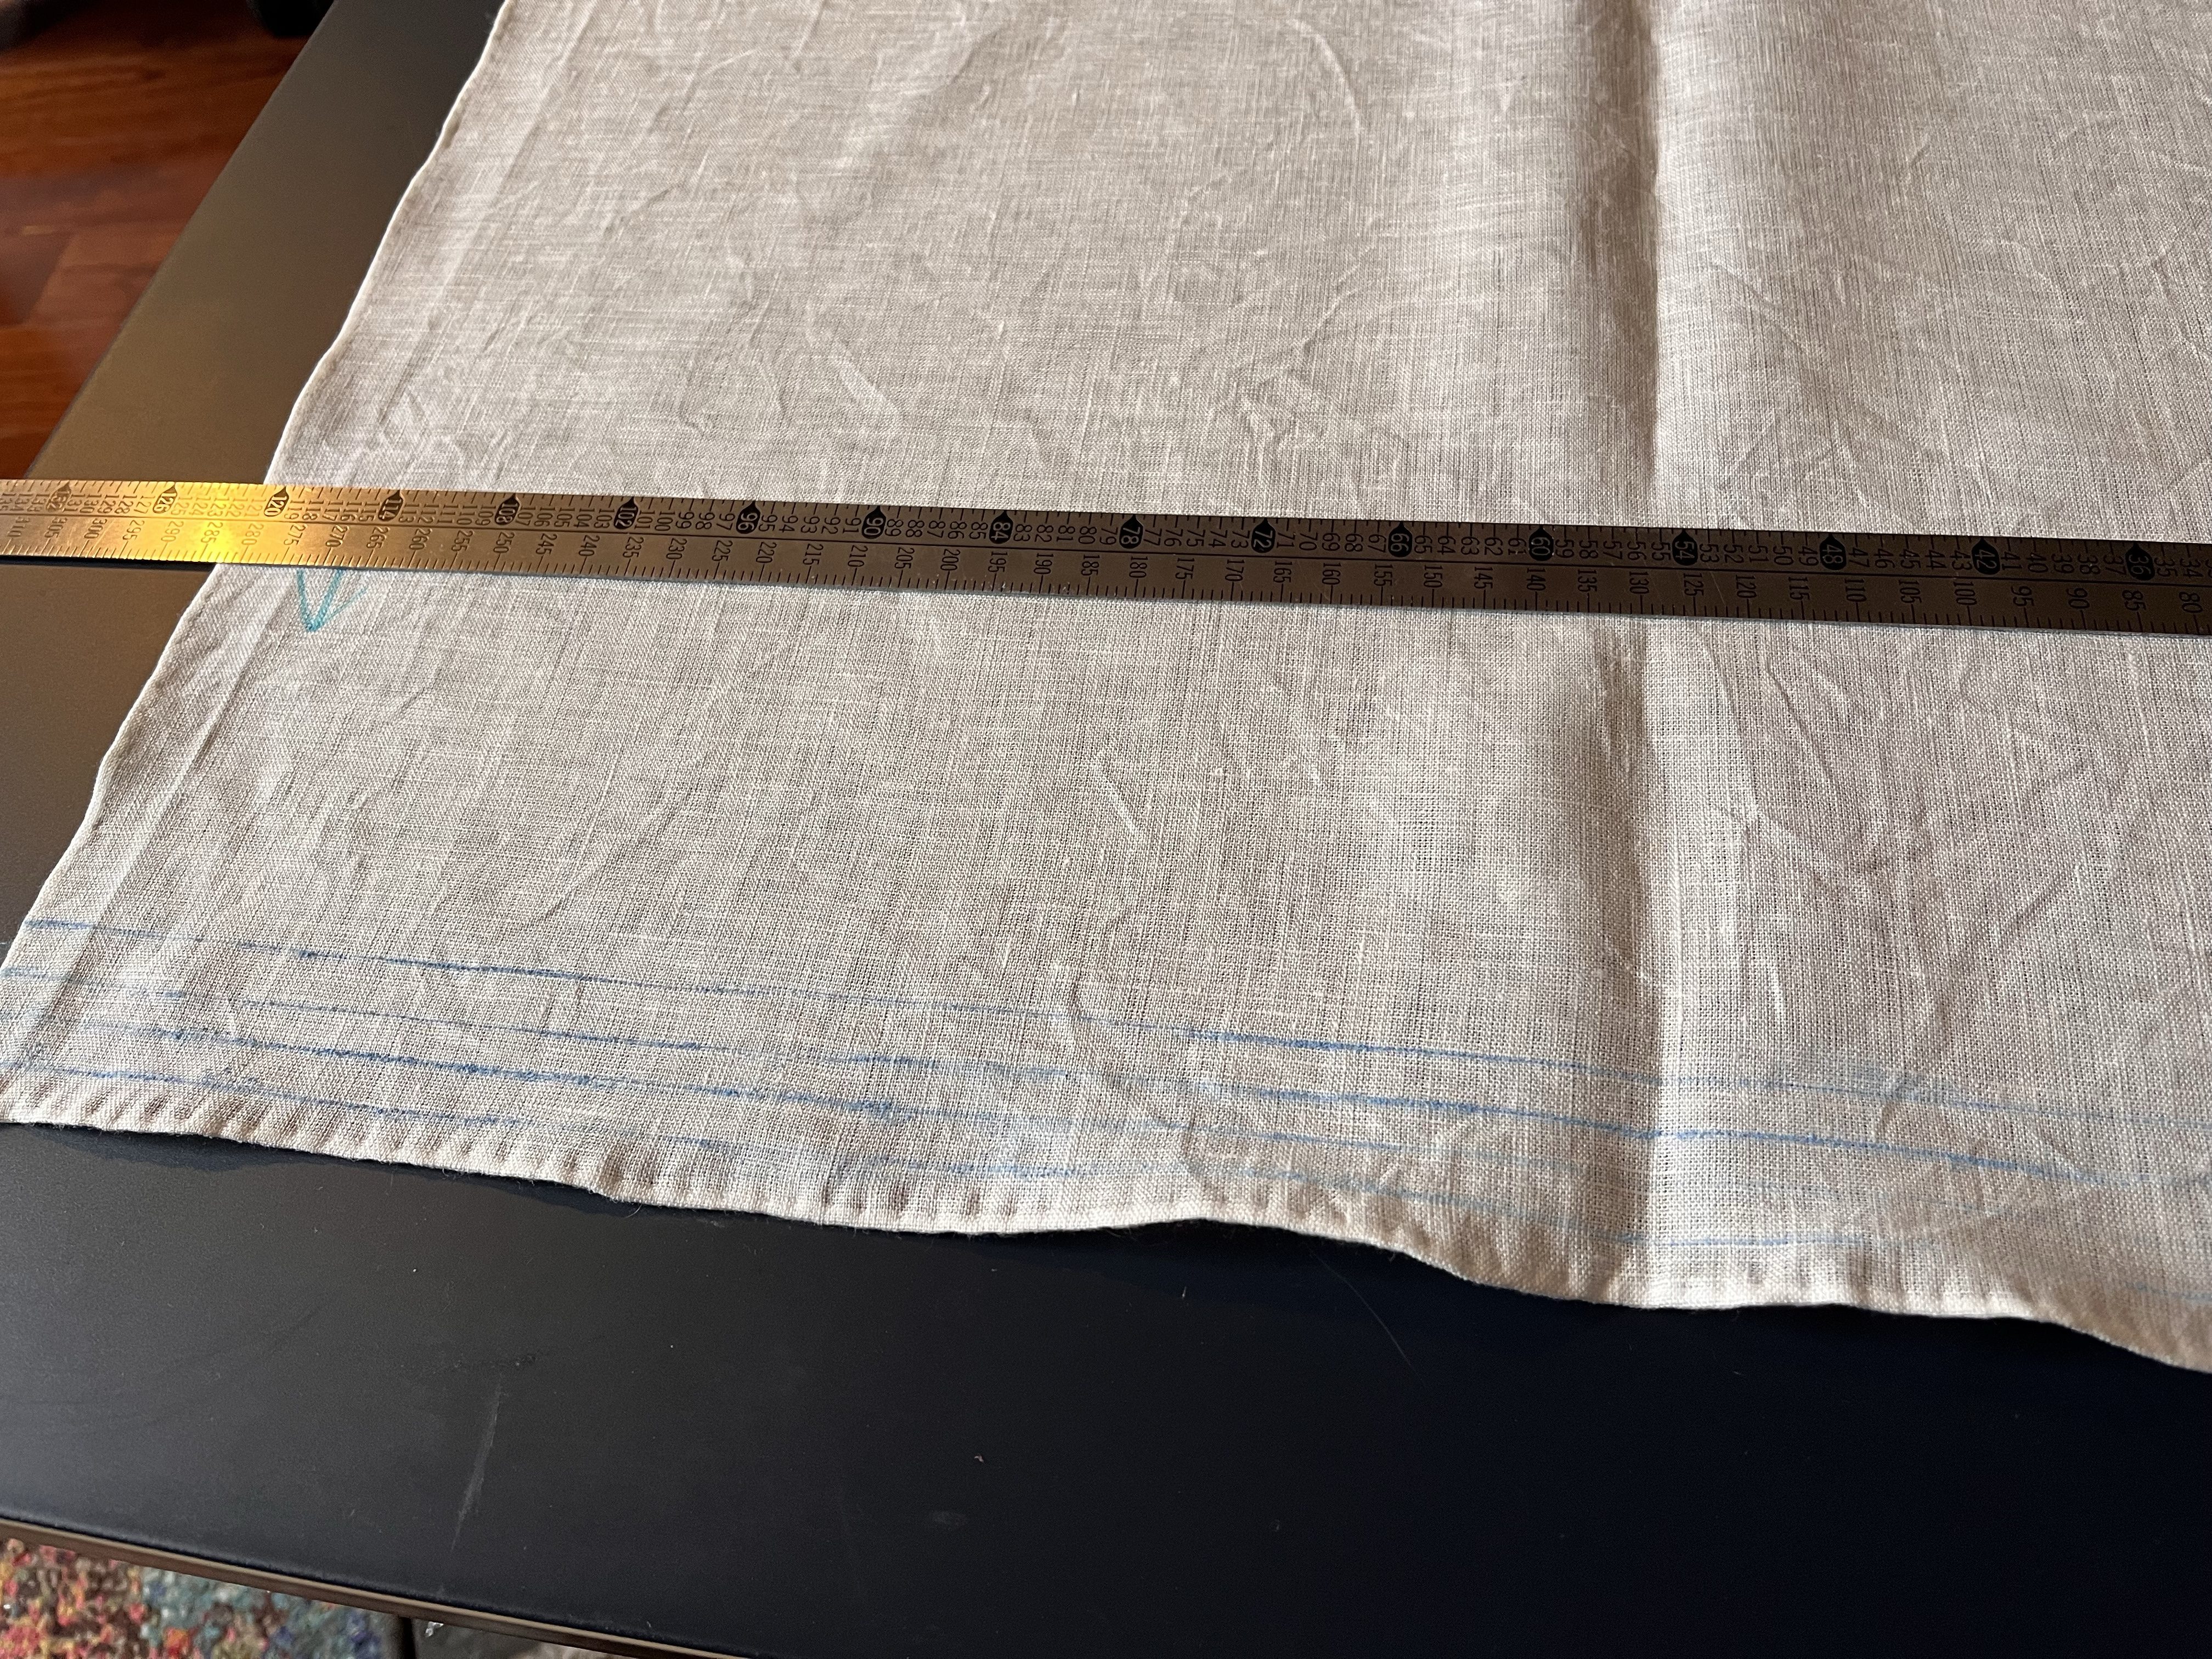
The rectangles were all cut out using the drawn thread technique (by drawing out a thread and then cutting along that line). I then hemmed all the edges except the selvages with a rolled hem stitch (video can be found on my tiktock here).
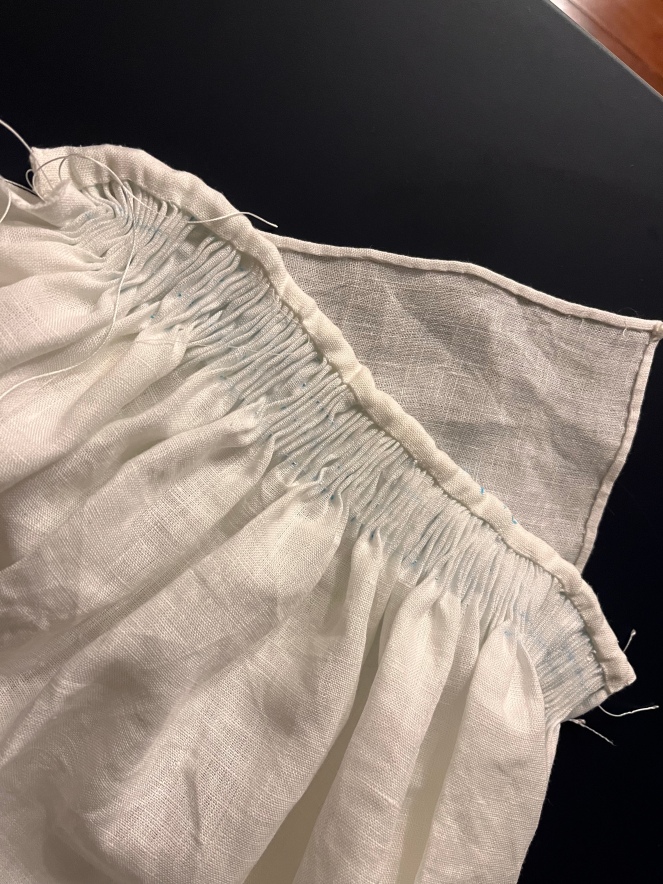
After this, I set about the arduous task of marking my pleats. I measured and drew lines, one cm apart, on the top of the front piece, the back piece, and then both the top and bottom of the sleeves. Then, I placed dots using my water soluble pen, every 1 cm along the line. Its at this point, that if you are doing this yourself, you should try and remove as much of your chalk lines as you can. I did not, and I still have blue marks in my fabric.
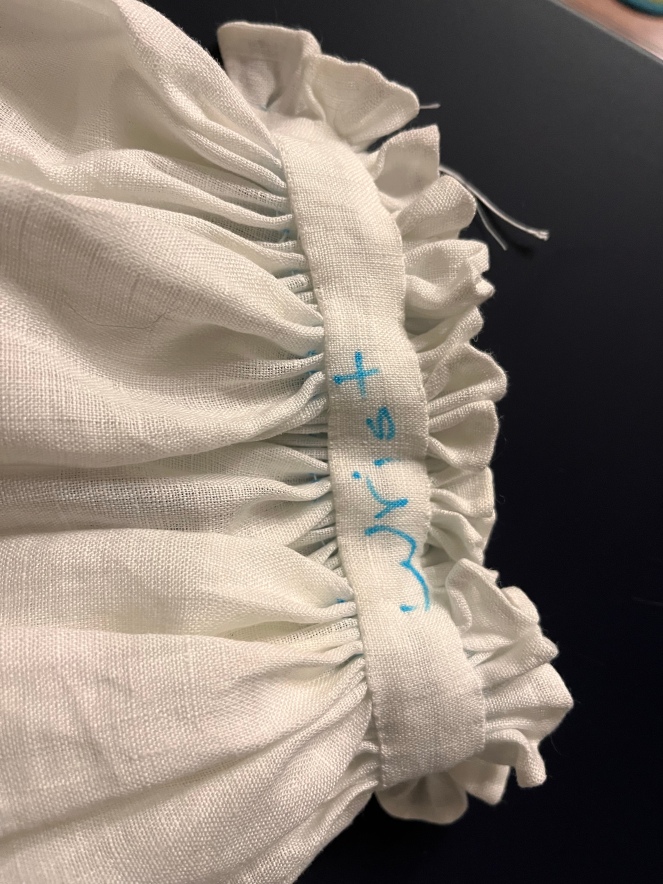
Then, I gathered the fabric. Fabric around the neckline was gathered by picking up 2 threads at each dot. Fabric around the wrists (which needed to be gathered tighter than the hemd) was gathered by going in one dot and out another. This resulted in a tighter gather.
Then, I stitched everything together using herring bone insertion seams. This made putting in the gores and gussets under the armpits much easier than with felled hems!
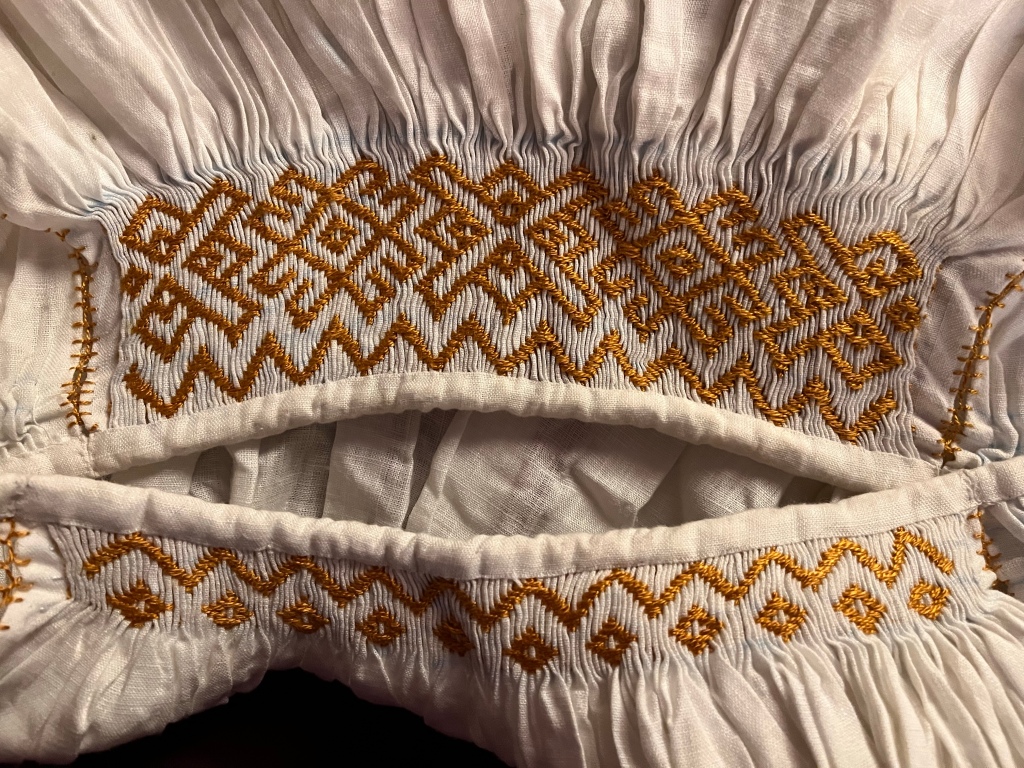
For the cuffs, because I knew I was stretched for time, and unlikely to have any time for embroidery, I simply cut a small rectangle 4 cm x 24 cm and carefully pinned the pleats to it. I then sewed each pleat down so that they were even.
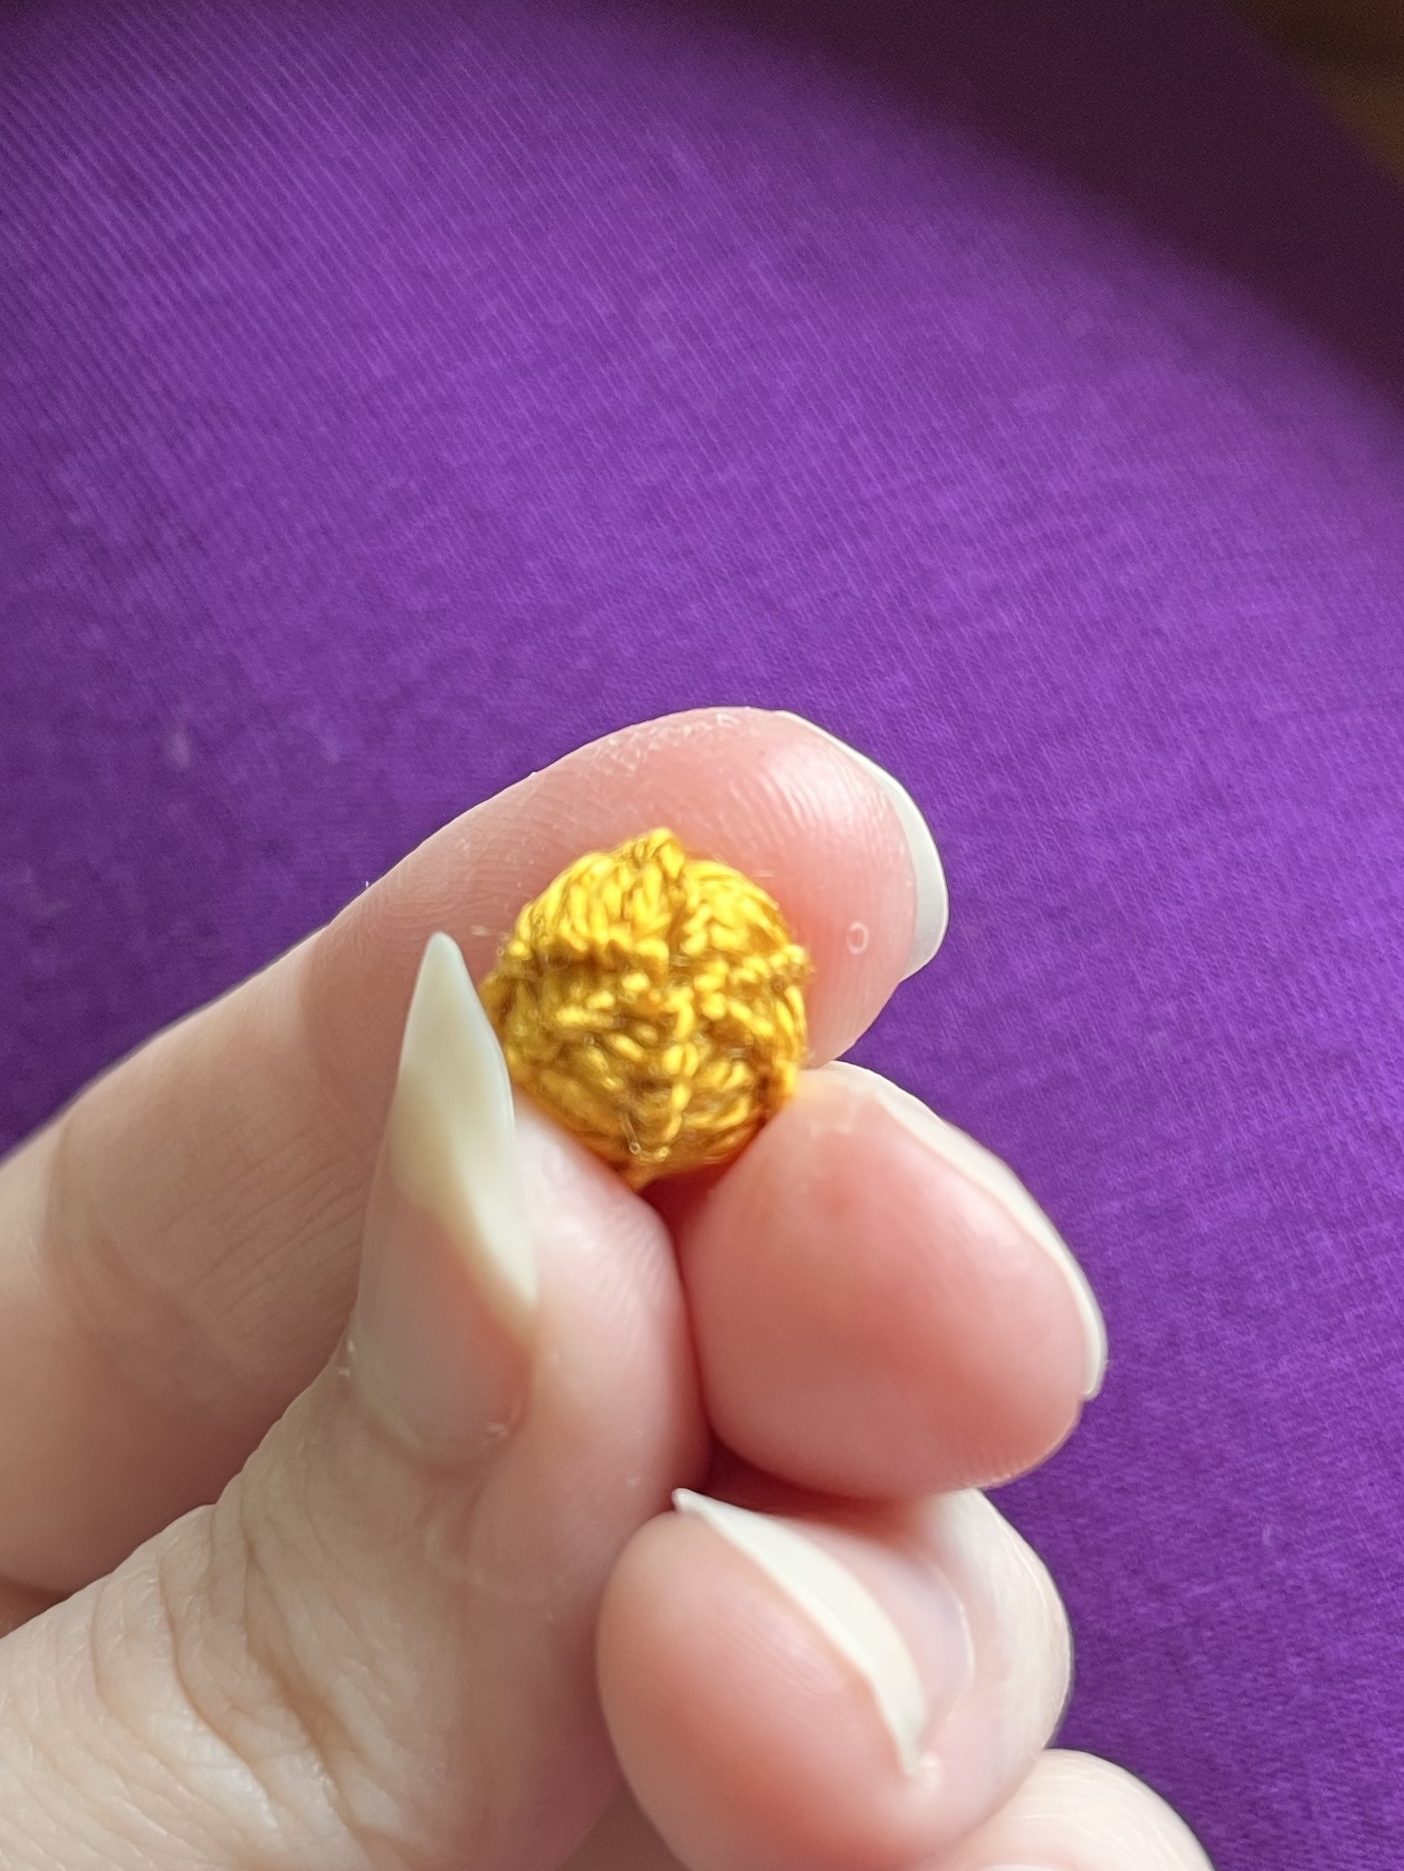
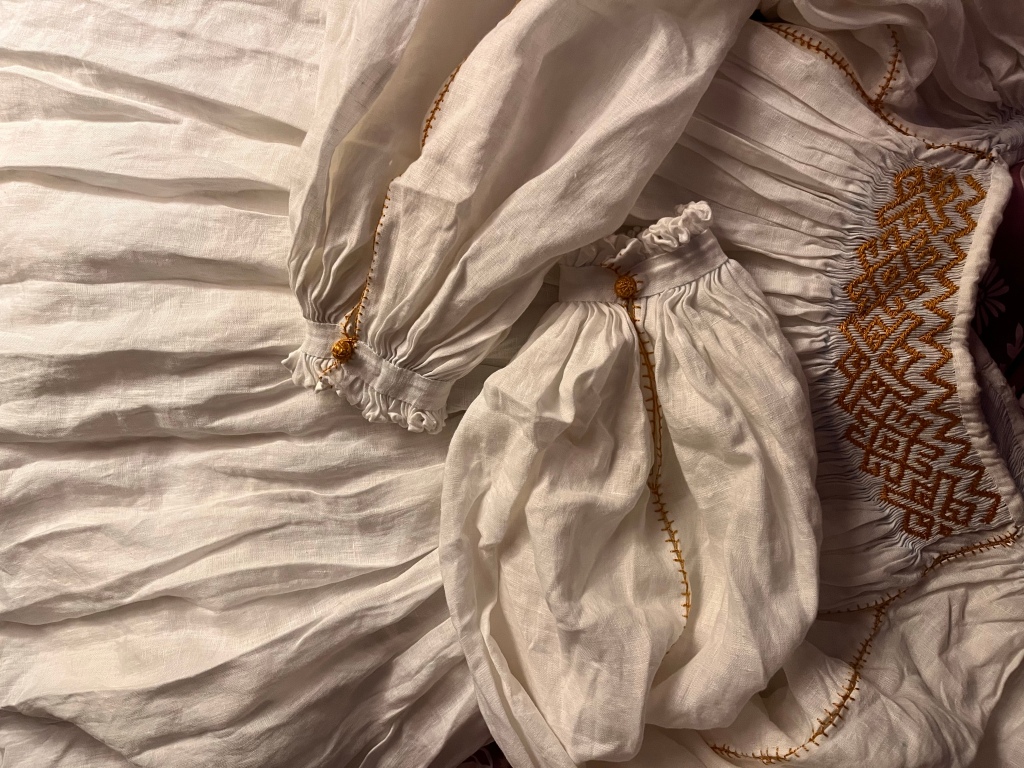
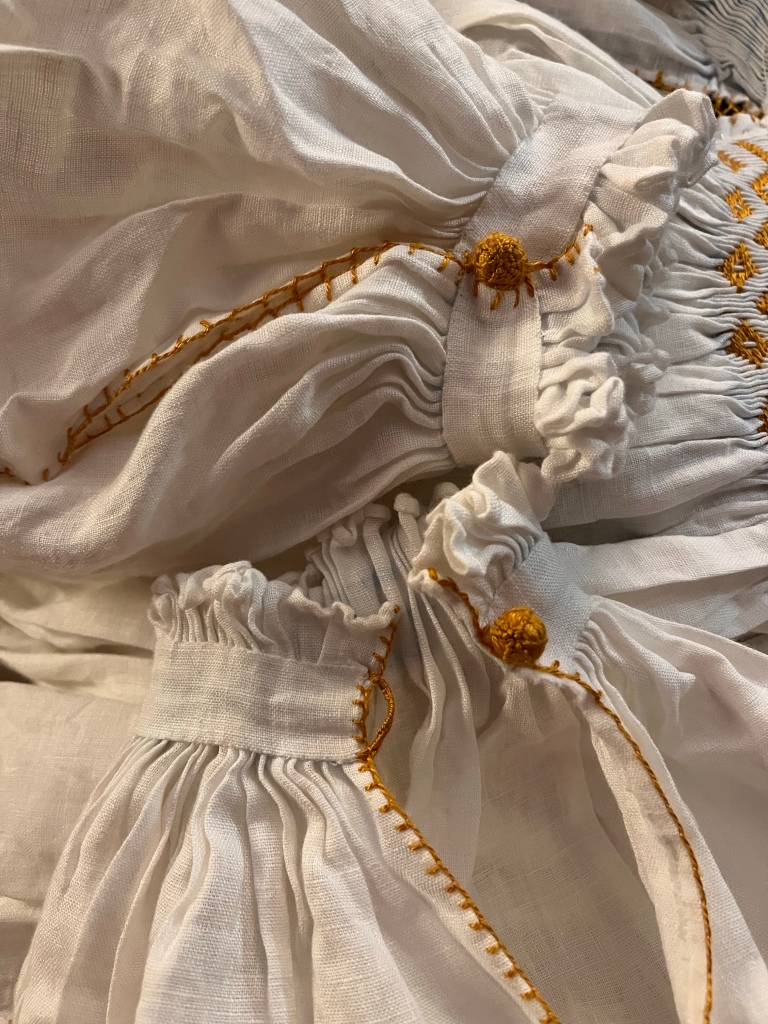
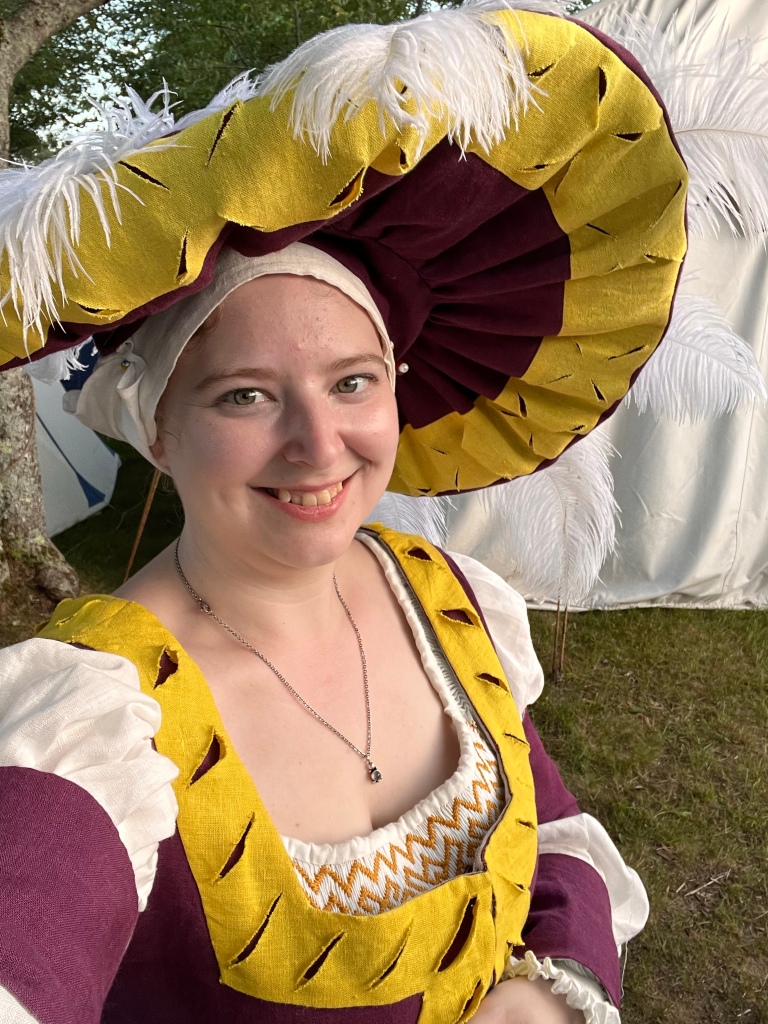
Finally, the sleeves were finished with a buttonhole stitch needle lace loop and an embroidered button (created using Master Bran Mac Fynin’s technique).
Originally, I thought I would leave the little ruffles at the top of the neckline, but ultimately decided to add stability by covering the ruffles with a binding and stitching that binding together. This was ultimately a great decision as it made everything easier in the end. The binding was folded under, and stitched to every pleat on the front and reverse of each pleated piece.
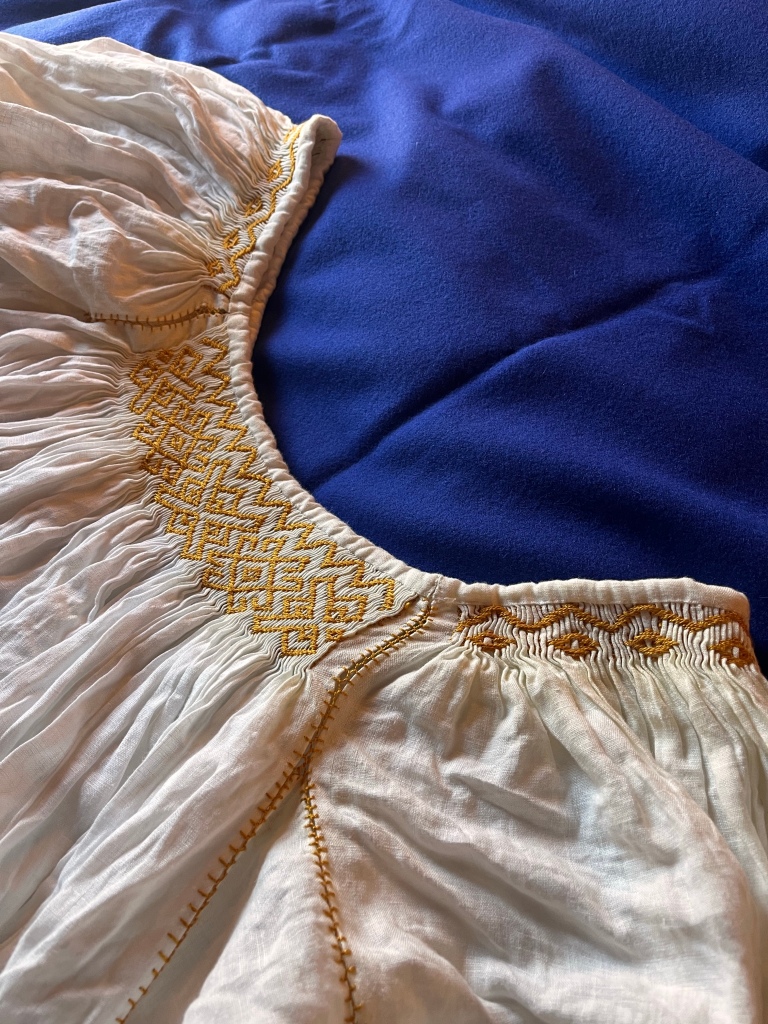
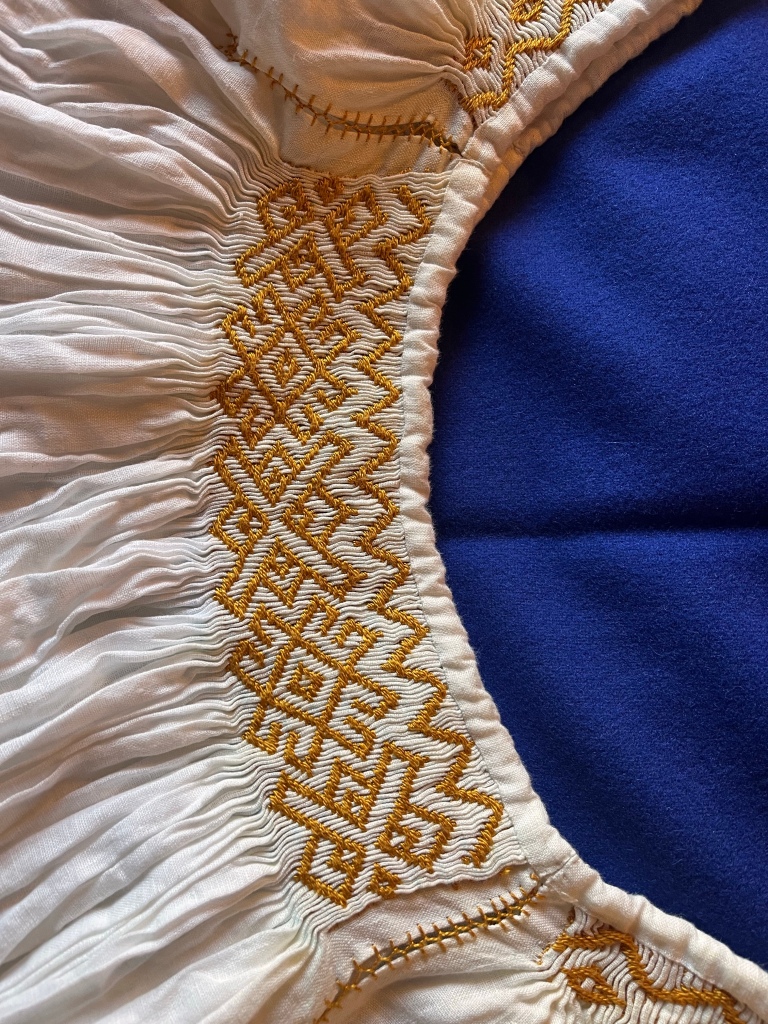
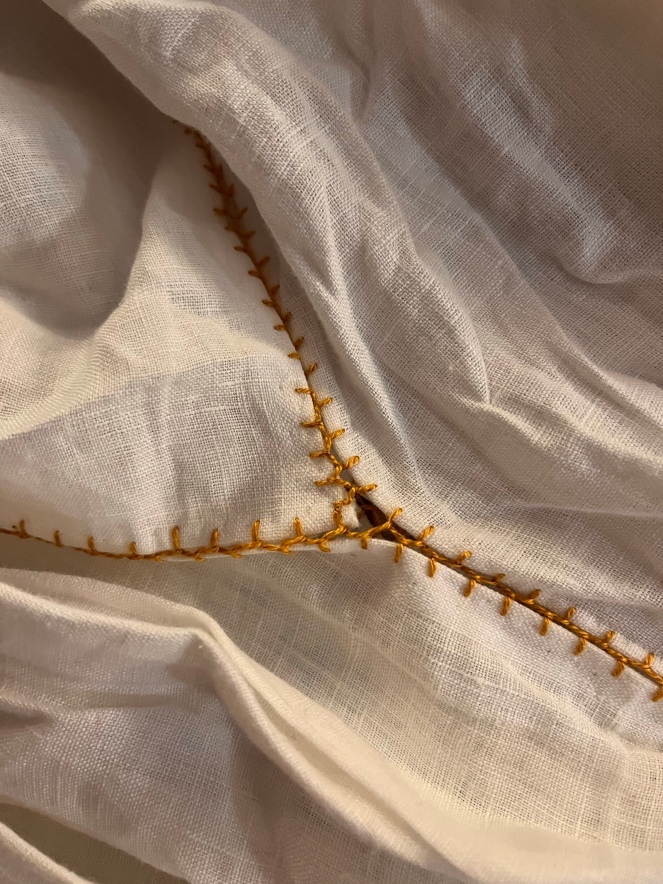
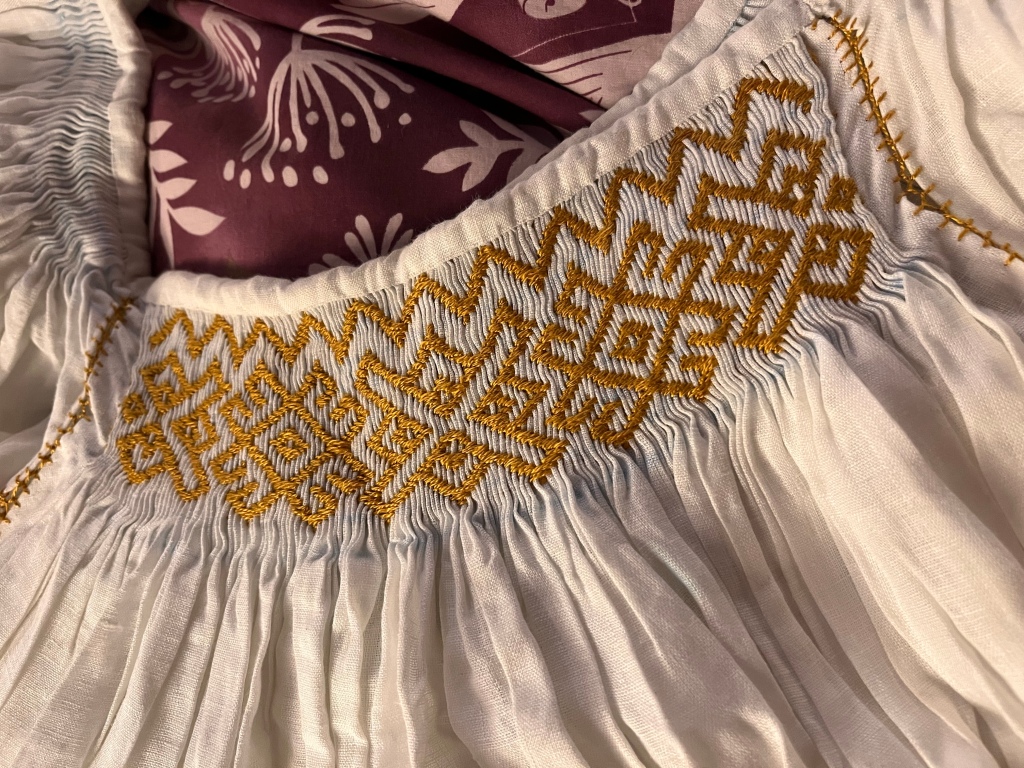
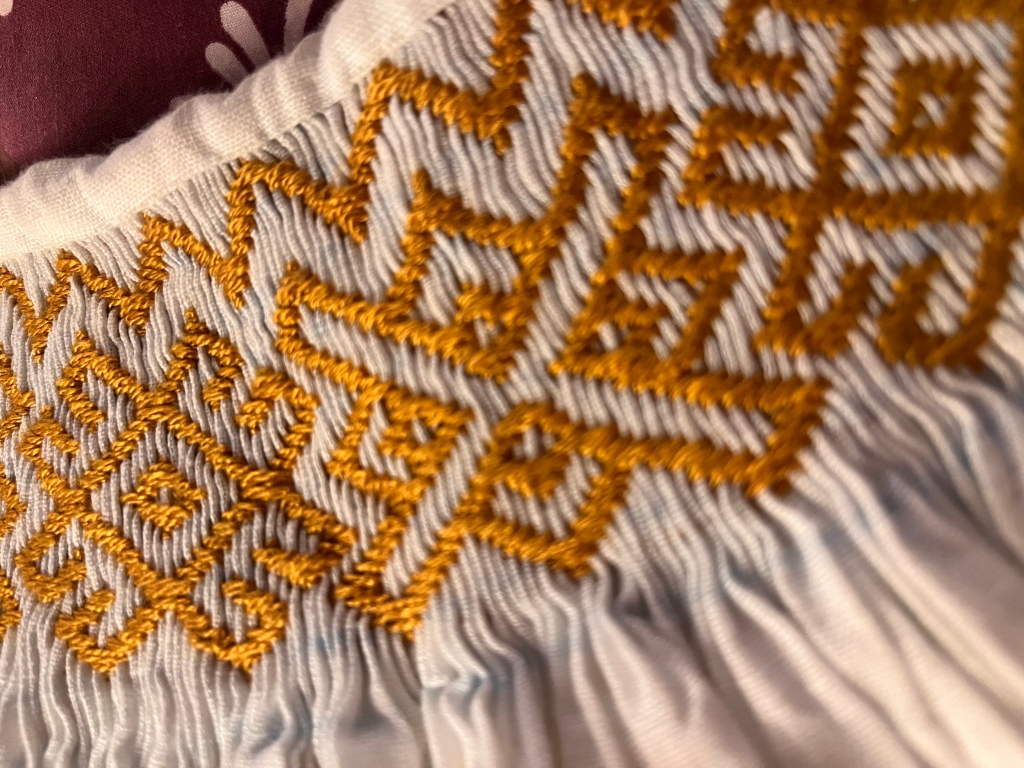
Then it came time for the smocking! This is again, a darning over pleats technique. So, a single thread is stitched through some pleats and over top of others. To do this, I marked my fabric with water soluble pen again, to make sure that I was counting the right pleats. I used my usual 2/20 weaving silk for this embroidery.
And of course, I managed to mess this up. Originally I was planning to stitch the pattern drafted by Glynnis available here. However, I counted 14 stitches in my chevrons, instead of 12, so I had to draft my own pattern.
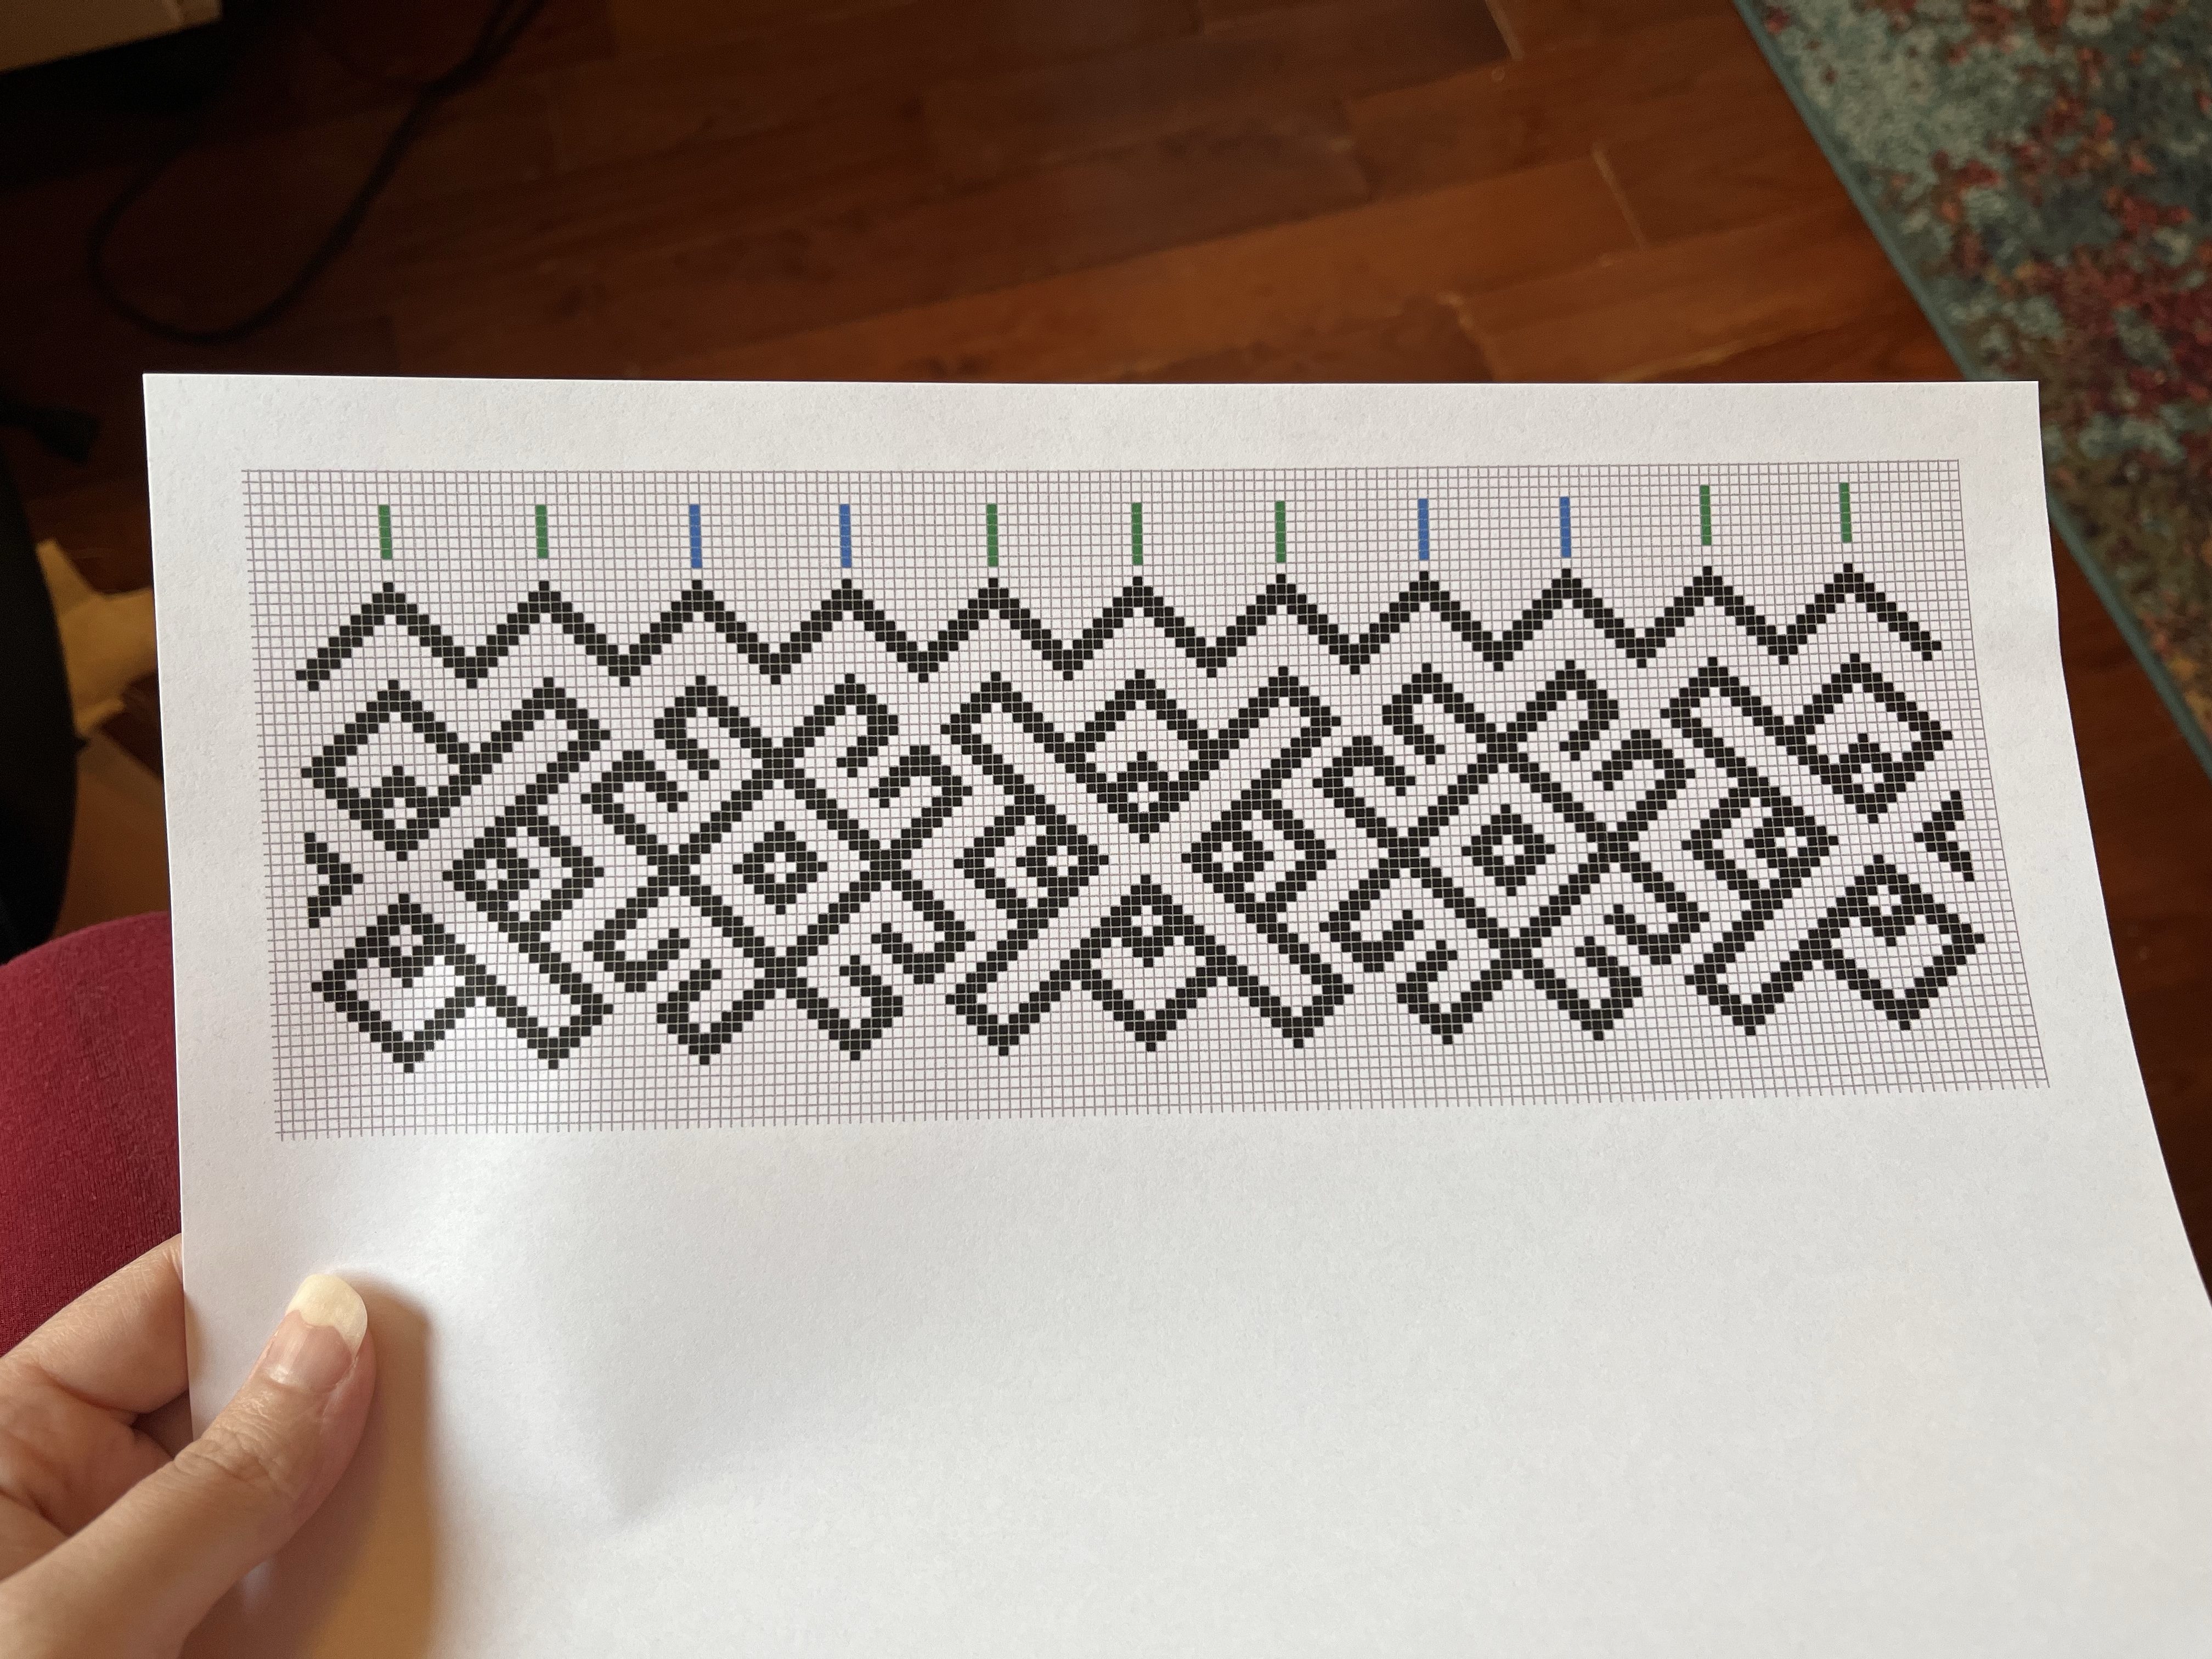
This pattern is similar but not exactly the same. It worked well though. And If I didn’t tell you, you wouldn’t know.
Each square is one pleat and each pattern line is made up of two or three lines of stitching. I started with three, but found that it was too thick, so I switched to two when I got passed the initial chevrons.
This stitched up quickly over the course of three full days. (Very quick, I assure you! I watched all of Titanic, a season of the witcher, and most of the first season of true detective during this period).
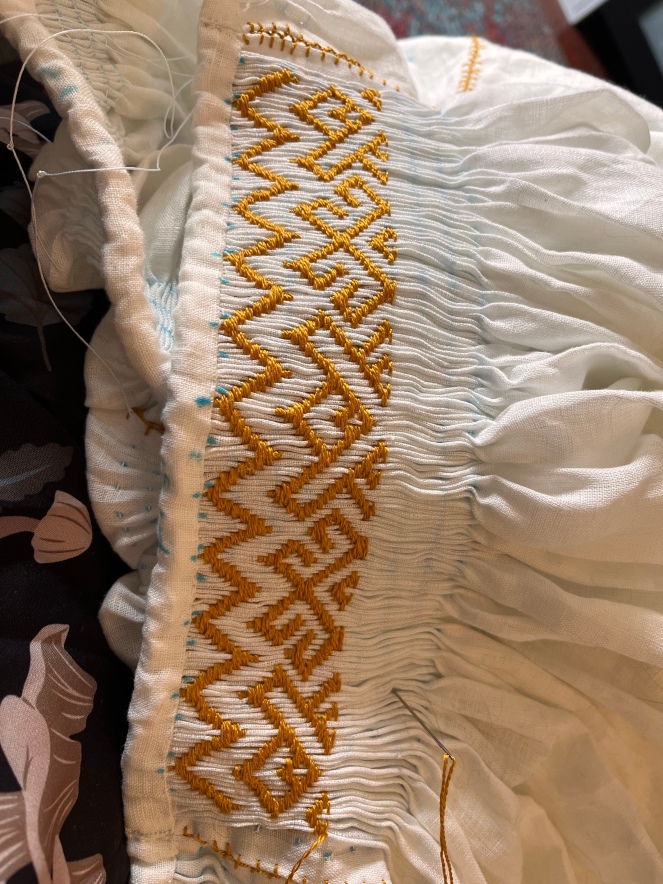
By the time I got in the car to go to GNEW I had 4 pattern lines left. Which meant, 8 lines of stitching.
And thankfully, I had a 6 hour ride in the car to Boston followed by a three hour ride to Maine, and this is how far I got!

Stitching still needs to be completed on the shoulders, but other than that. It is done, and was certainly done enough to wear! I am super proud of this one. It is every bit as pretty as I thought it would be. And it fits so well. I do think it might need a fancier dress to go with it though….

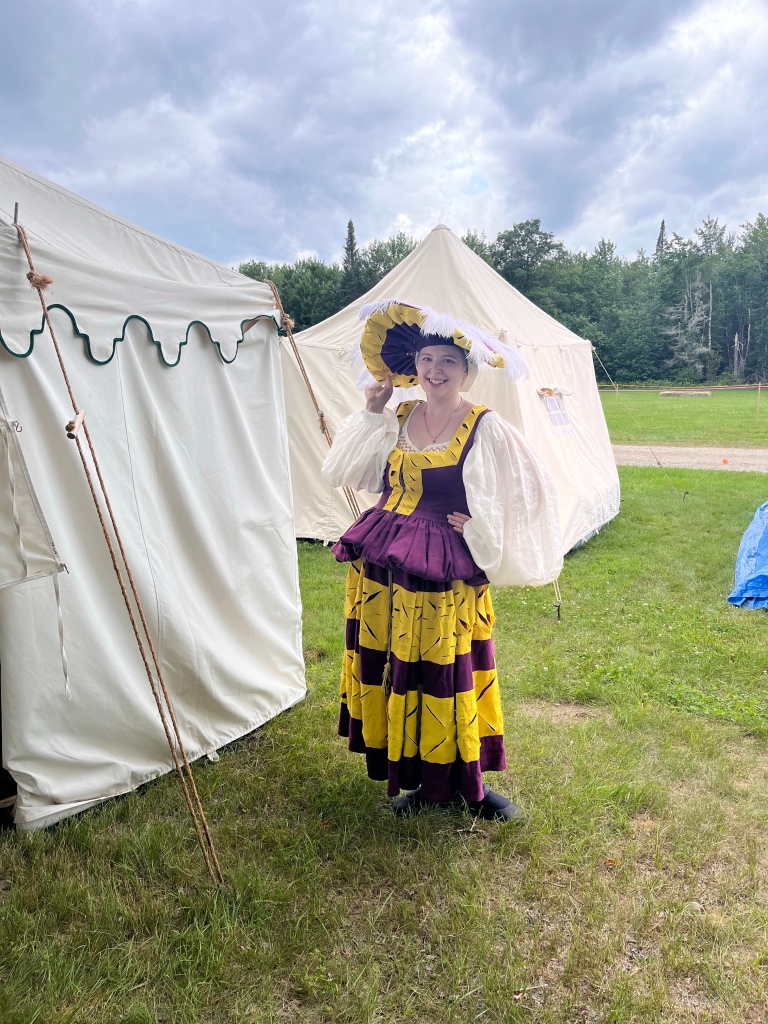
I promise to write a blog about the silly hat sometime too.
Updates (1/16/23)
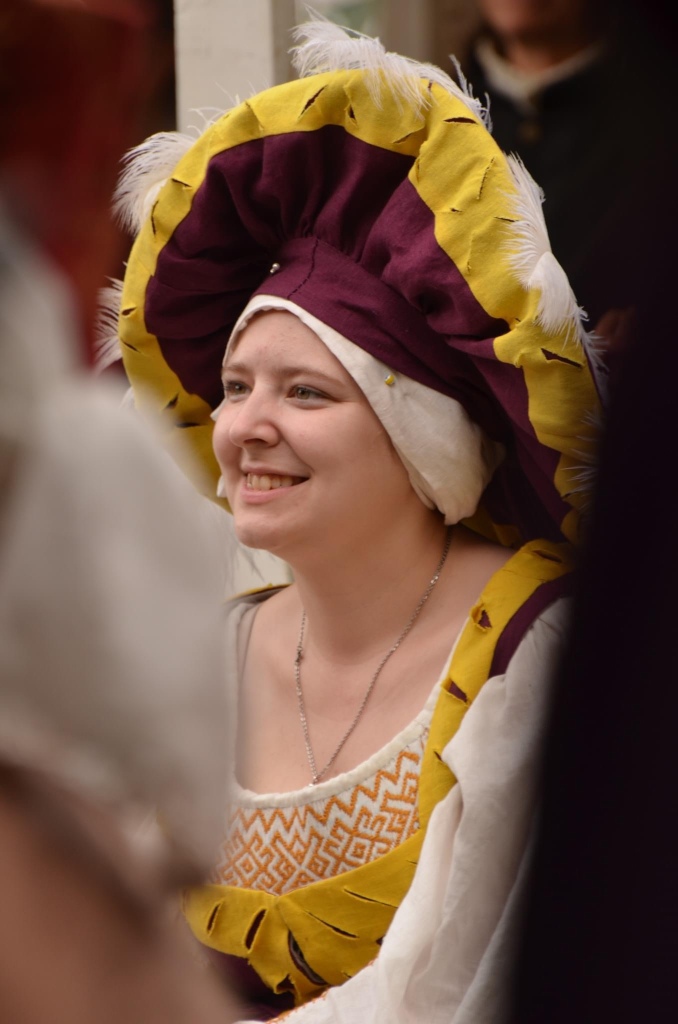
I finished the shoulders of the chemise just in time to take this project to Saint Eligus, an arts and science competition in the East Kingdom. I am happy to report I won the “experienced” category with this piece! Here are some updated pictures.