Story of recreating a 1540s linen shirt.
This year my friend and mentor Beth asked me if I would be interested in helping make one of the many Elizabethan shirts for the new King Consort for the East Kingdom. After much debate over time and commitments (and my own excessive obsession with perfection), I said yes.
At this same time, the School of Historical Dress in London re-released their Patterns of Fashion 3 and 4. Both of which are amazing works of research detailing with amazing pictures and patterns of extant garments from the sixteenth and seventeenth centuries. I have a copy of the old version of Patterns of Fashion 4, and side by side with the new version, full of new information and detailed pictures, it is worth getting a new copy.
Anyway, long ago, I fell in love with the idea of recreating this shirt from the Victoria and Albert Museum.

Something about the tiny details, the insertion stitches, the beautiful handwork, drew me to it. I also enjoy the different cut of the shirt. However, as part of the larger project, my shirt pieces came pre-cut to the proper measurement so I will experiment with the cutting diagram for this shirt sometime in the future. And thus I embarked on a journey of embroidery, tiny stitches, amazing linen and time.
Collars and Cuffs
The first step was to chose an embroidery pattern/style for the embroidery of the collars and cuffs. The original shirt is embroidered with some of the tiniest cross stitches I have ever seen. And while my eyes are good, I cannot possibly do that level of stitching without magnifiers and bright lights. Knowing that this project was one that needed to be portable to be completed on the road and in between activities of my mundane modern life, I chose a different rout.
Our King Consort’s coats of arms include Fleur De Lis, so I went on a journey through the extant model books of the early 1500s to find a pattern that I thought would give us fleurs (which was actually harder than I thought it would be). I settled on the fleur like pattern in the bottom right of this folio for the collar.

And this one (second from the bottom) for the cuffs.

After the patterns were chosen I corrected the grain of all the pieces by pulling a single thread to make sure that my pattern was on grain of the fabric. This is something I almost always do with linen. Then I used a light box to mark the pattern with ink pen (daring!).

The collar and cuffs were stitched using Holbein Stitch or Double Running Stitch over the drawn pattern.
I think it took about a week and a half to embroider the collar.

But the cuffs came together over the course of one long day of watching Oscar Nominees (Poor things, Barbie and the Holdovers, if you are wondering). One thing I always think is interesting is that the things I am doing or listening to when I embroidery often become coded into the embroidery when I look at them. Thus, my blue dress reminds me of Super Nova of the East, and these cuffs will forever remind me of Poor Things. Which, is an interesting psychological phenomenon, but I digress.
The extant shirt also has an embroidered ruffle on the collar. Initially I chose a much larger fleur de lis pattern for this, but I ultimately decided it did not have the correct proportions, and picked out my stitches and replaced it with much smaller fleurs.

The next step was to carefully cut out the cuffs and the collar and carefully press the edges under. The ruffles were also cut out and the edges finished with a tiny rolled hem.
Construction of the Cuffs
All of the edges of the pieces of the shirt, including the body, sleeves and gussets were finished with the same tiny rolled hem I used for the ruffles. However, I realized that the rolled hem would be too bulky to be gathered inside the cuffs, and therefore I trimmed it off.
I used a silk thread to carefully gather the cuff and the ruffle with tiny 1/16th inch stitches and then pinned those stitches onto the embroidered cuff. Then I used a linen thread to carefully stitch every one of the stitches into place.

I then took another piece of linen which was cut and pressed to be the same size as the embroidered cuffs, and carefully sewed that to the inside, covering all those pesky ruffles and loose threads.

Surprisingly this activity only took about an hour. Which, was pretty surprising to me. And I was able to finish both cuffs in one night!
Construction of the Collar
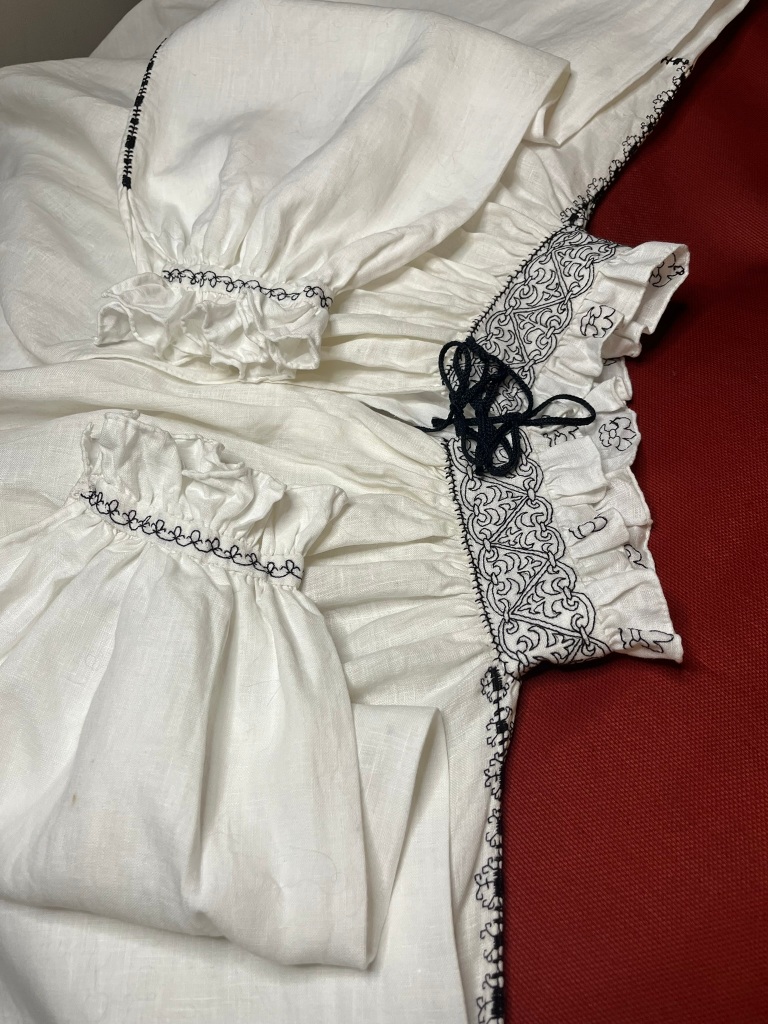
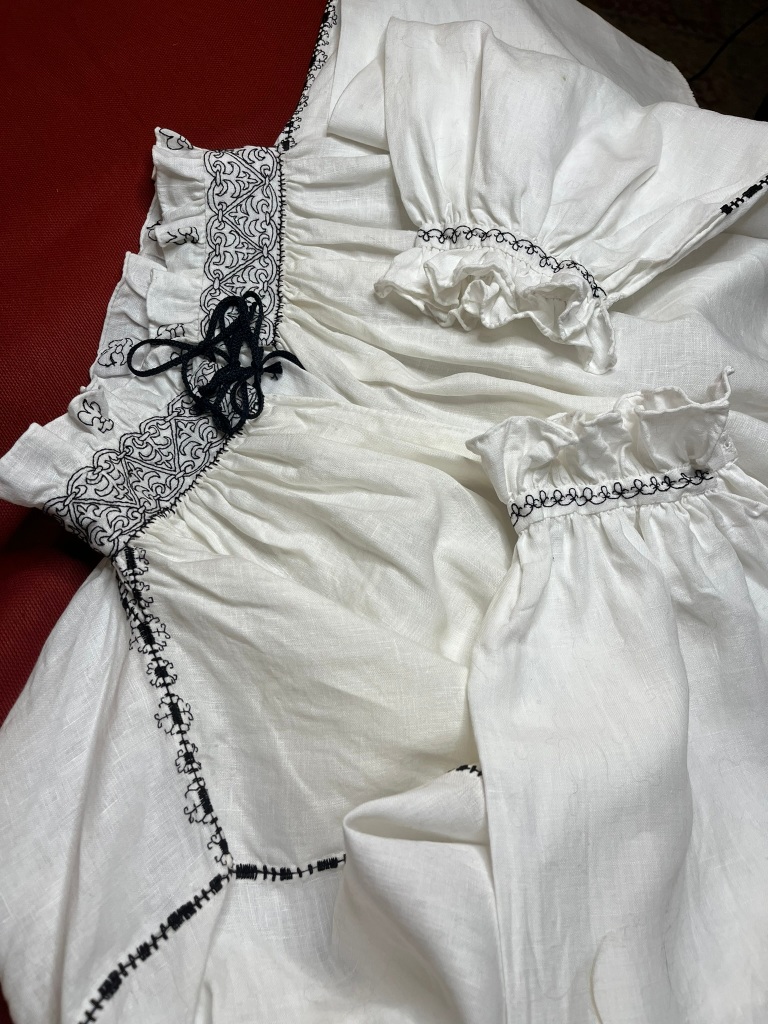
The collar was made in a similar fashion. However I needed to insert finger looped tie closures into the collar. The finger loop pattern I believe most closely matches the original is a flat string. This was determined by repeatedly squinting and magnifying the photos. These braided up rather quickly and, turned out very pretty.
The ruffle was gathered in the same way as the cuffs, and carefully sewn using linen thread. I find linen thread to be better than silk for sewing with linen as it really holds the fibers in place.

After the ruffle was sandwiched in between the two pieces of collar, I sewed the remaining sides shut.
Insertion Seams
Before attempting to attach the shirt to the collar, I realized I needed to figure out how to do the insertion seams. On a prior hemd I made I used insertion seams to hold the pieces together, but I realized that the stitches were placed rather far apart, and just didn’t seem as sturdy as they should be. So I decided to try and replicate the insertion seams of the extant shirt.

And my first attempts were BAD. Look at those giant uneven ugly stitches. Like spiders. Eww.
The first problem I realized was that these stitches and the thread are just way too big. I was able to get a photo from a friend who had seen and measured the extant shirt, and these little insertion groupings measured between 5mm and 10mm wide! So tiny, so I plucked out those stitches and began again.

And, as I began to put these pieces together, I got progressively better at these tiny stitches.
But, I really love how this came together. I used these stitches to attach the shoulders together (adding in a little triangle gusset at the collar) and attach the sleeves to the body. The stitches of the original were still tinnier than mine, but some short cuts must be made in the name of time.
Attaching the Collar
The collar was then attached with more insertion stitches to reflect the original construction. The shirt portion was gathered down to the proper size, and then the collar was stitched on using knotted insertion stitches for additional strength.

I was not happy with how strong this felt, so I went in and stitched the gathers to the inside of the collar using tiny stitches in white linen thread for added security.
Embroidered Seams
And, because ALOT was just not enough, I decided I needed to add some embroidery to the insertion seams just like the original.
This again posed a learning curve, as the stitches were just SO TINY on the original, the entire motif being less than 10mm wide. And thus, much smaller than I expected.
At first I started with some water soluble pen, but I ended up basically counting threads to stitch the designs. I was not counting the threads exactly, but eyeballing the spaces between stitches and stitch lengths.

The pattern was not exactly as close to the original as I wanted it to be, but it was very lovely and captures the essence of it.
Final Pictures
And that’s a shirt fit for a King! Overall it took about 5 weeks to do all of this, and every moment of it was done by hand, with love and care (and a fair amount of obsessiveness).


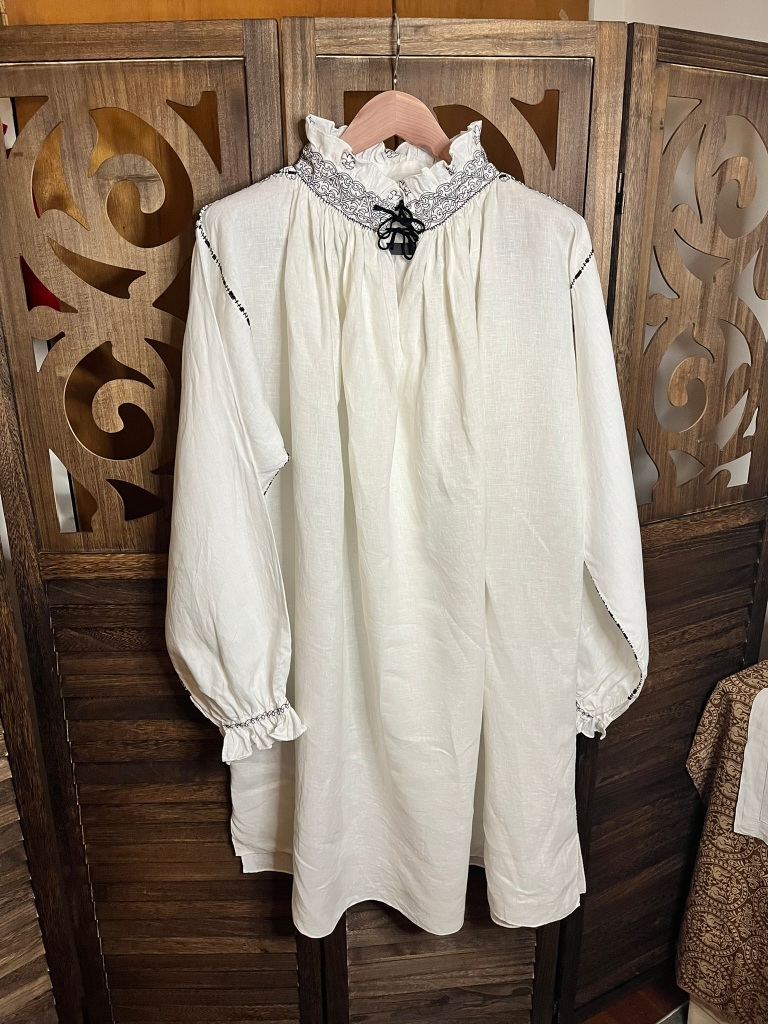


There are many little things I would change/add to make this shirt closer to the original, but time is of the essence. I would add embroidery to the sleeve ruffles, and around the edges of the ruffles and neck/hand openings, to give it a more finished look. I would also continue the embroidery around the insertion seams as I find them to be unbelievably beautiful and really the hallmark of the extant shirt.
